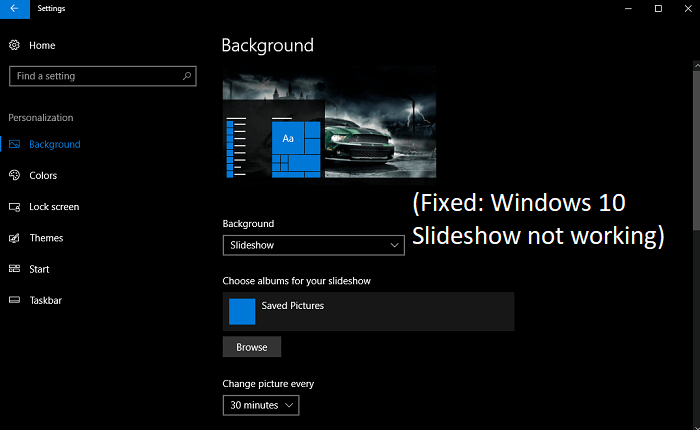
Windows 10 desktop slideshow is personalization features of Windows OS. The same feature is also a part of Windows 10. When you enable this feature, it will automatically change desktop wallpaper or background at given interval span. To enable Windows 10 desktop slideshow feature open Settings window -> Personalization -> Background tab. On the right side use the background drop-down to select slideshow. Sometimes while working on the system users notice that Windows 10 slideshow not working. It means that desktop slideshow is not changing the background at given interval span even when it is enabled.
Fix: Windows 10 Slideshow Not Working
Now, this is a really annoying issue and by keeping this thing in mind I decided to gather all the possible solution to troubleshoot the desktop slideshow issue.
1. Reboot your system
The first troubleshooting suggestion is to perform a quick system reboot and check this fixes the issue or not.
1. Find Out if Desktop Slideshow is Enabled
If Desktop background slideshow feature is not enabled by you, then Windows 10 slideshow will not work. So it is recommended to check if Windows 10 background is set to Slideshow. To check this:
- Launch Settings app. For that, WIN + I.
- Click on Personalization -> Background.
- In the right pane, Under Background section check if Slideshow choice is picked instead of Picture or Solid color.
In case, the slideshow is chosen and still Windows 10 slideshow is not performing, then try other suggestion. On the other hand, if Picture or Solid is selected, then use the drop-down and select Slideshow.
2. Check Number of Desktop Background
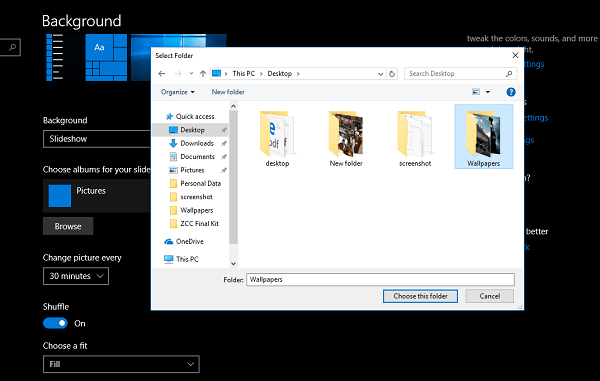
When you enable desktop slideshow in Windows 10 then system ask you to choose a folder in which all the wallpapers or photos are stored that you want to use in the desktop slideshow. In case, desktop wallpaper slideshow feature is not functioning, then it is recommended to check if the selected folder has more than 2 photos. The slideshow feature will not work if it has only one photo. If you really want to take advantage of this feature, then I recommend you to have at least 4-5 wallpapers or even more. To select wallpaper folder, you’re required to:
Launch Settings app -> Personalization -> Background. On the right pane, under “Choose album for your slideshow” click on Browse button and navigate to wallpaper folder where you have stored all the pictures.
3. Slideshow – Picture Switch
According to some users, they tried both suggestions discussed above but failed. They manage to make Windows 10 slideshow working by doing following steps: Settings app -> Personalization -> Background. On the right pane, under Background section switch to Photos from Slideshow. Wait for few seconds… Again switch to Slideshow from Photos. By doing this these users able to fix Windows 10 slideshow not working issue.
4. Change Wallpaper Folder
In case, all the solutions discussed above fails to fix the issue. You can try to change the folder with all the pictures for desktop slideshow feature. With default settings, the system uses Photos folder for slideshow feature. To make changes you’re required to:
- Launch File Explorer.
- On the left pane, click on Pictures -> Saved Pictures folder Now here you’re required to copy all the pictures from Picture folder to Saved Picture folder which you have to include in Slideshow album.
- After that, launch Settings app -> Personalization -> Background. On the right pane, under “Choose album for your slideshow” section click on Browse button and select Saved Picture folder in which you have transferred all the pictures in 2 step.
That’s it. I hope this fixes the issue.
5. Uninstall Newly Installed Desktop Customization Apps
In case, while reading this article you reached this suggestion, then it is confirmed that so solution helps you in fixing the issue. In this situation, the reason why Windows 10 slideshow not working because of the desktop customization software installed recently. So if you have installed any, then uninstall it just to troubleshoot the issue. To uninstall apps go to: Settings -> Apps -> Apps & features. On the right pane, look for the software you want to install click on it and press the Uninstall button.
6. Install Another Desktop Theme
In case, Windows 10 desktop slideshow feature is now working for a particular theme, then try to install another theme and check if it is working fine or not. To download and install the latest theme in Windows 10 navigate to: Settings -> Personalization -> Theme. On the right pane, click on “Get more themes in store” link. It will take you to Windows Store theme section. Here you can download and install the theme of your choice. All the best! I hope any of the solution discussed above will help you in fixing Windows 10 slideshow not working. For more assistance drop your query in the comment.