Windows 11 comes with a feature called Cloud Content Search feature which when enabled shows personalized search results and content from various Microsoft Cloud services like Outlook, OneDrive, Bing, SharePoint, and others. The feature is enabled out of the box. Although Cloud Content Search is a nifty feature of Windows 11, there’s a problem. What if anyone has access to your computer and uses Windows search, it is possible they can see personalize search results (personal data) from cloud storage too.
Enable or Disable Cloud Content Search in Windows 11
Due to this reason, some users might want to turn it OFF. If you don’t want Windows to show results from your cloud storage then here is how you can disable cloud content search in Windows 11. Let’s start with the first method:
Use Settings app to Disable Cloud Content Search in Windows 11
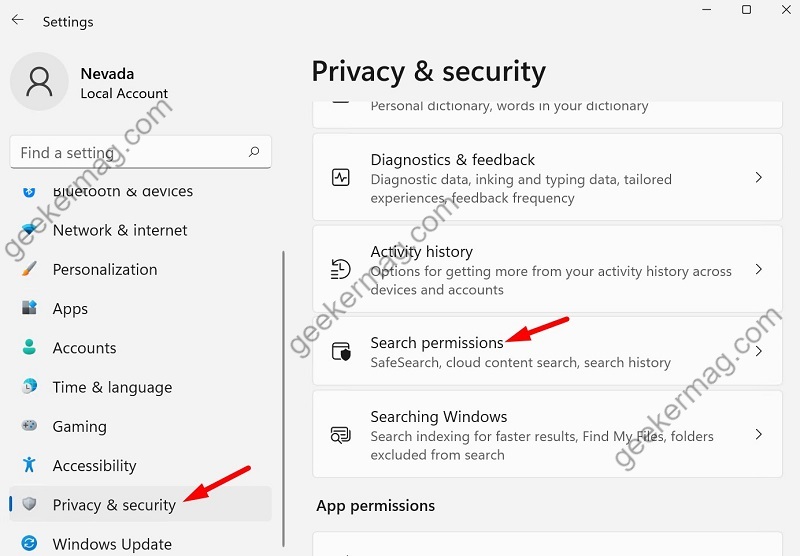
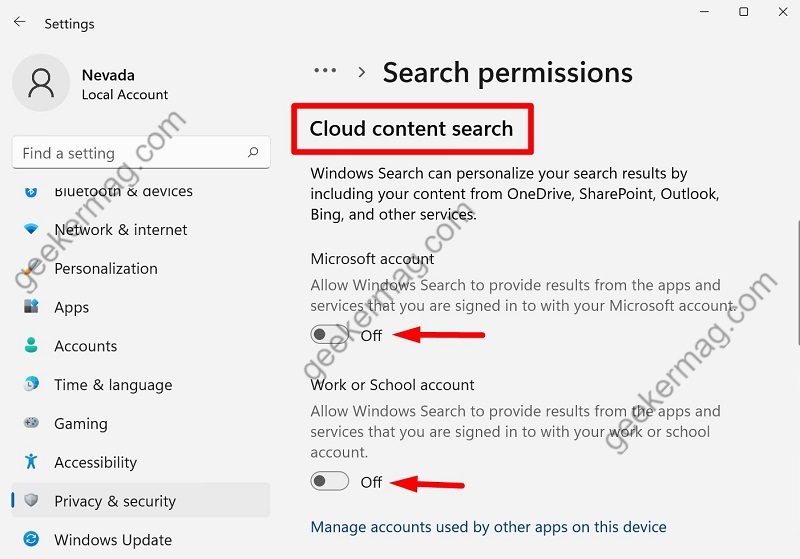
Launch the Settings app in Windows 11 by pressing the WIN + I key combination In the Settings app, switch to Privacy & Security and then select the Search permissions option listed under Windows permissions. Scroll down and find the Cloud content search section. Here you will see two options which include:
Microsoft Account – This option will search results from all apps and services using your Microsoft account.Work or School account – This option will search results from apps using your work or school account.
Depending on your choice, disable these options, and you are done. You can now close Settings and you won’t see any results from your cloud.
Use Registry Editor to Disable Cloud Content Search in Windows 11
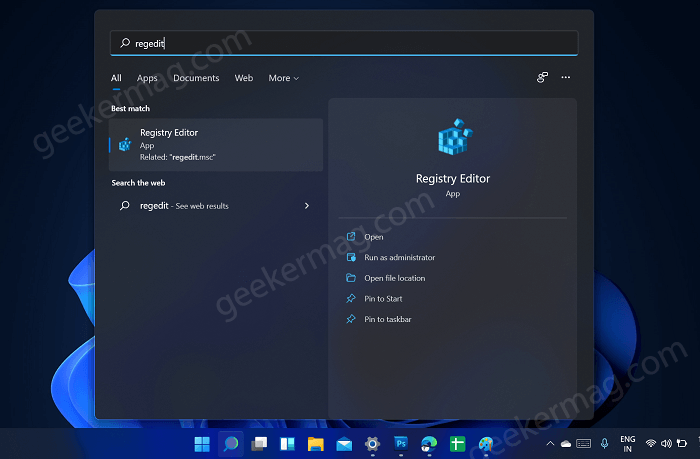
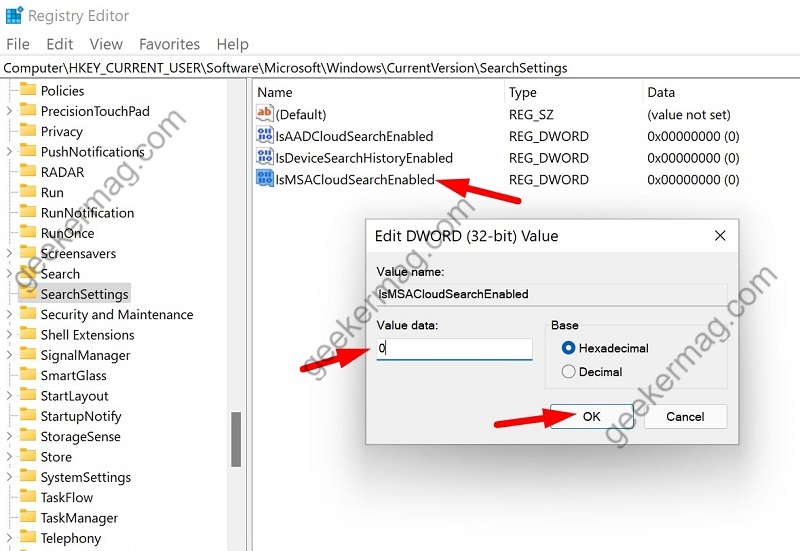
Press the Windows button to open the Start menu and then search for regedit and when it appears in search results, click to open it. In the Registry Editor, navigate to the following path: HKEY_CURRENT_USER\Software\Microsoft\Windows\CurrentVersion\SearchSettings (Copy and paste this path into the address bar) For Microsoft Account In the right sidebar, find the IsMSACloudSearchEnabled key and double click on it, and set its Value data to 0 to disable cloud content search for the Microsoft account. For Work or School account: In the right sidebar, find the IsAADCloudSearchEnabled key and double-click on it, and set its Value data to 0 to disable cloud content search in Windows 11 for work or school Microsoft accounts. Click on the OK button and close Registry Editor and reboot your computer to apply the changes. At any point, if you want to enable Cloud Content Search for Microsoft account and Work and School account, then you need to set Value data to 1.
Use Group Policy Editor to Disable Cloud Content Search for All Users in Windows 11
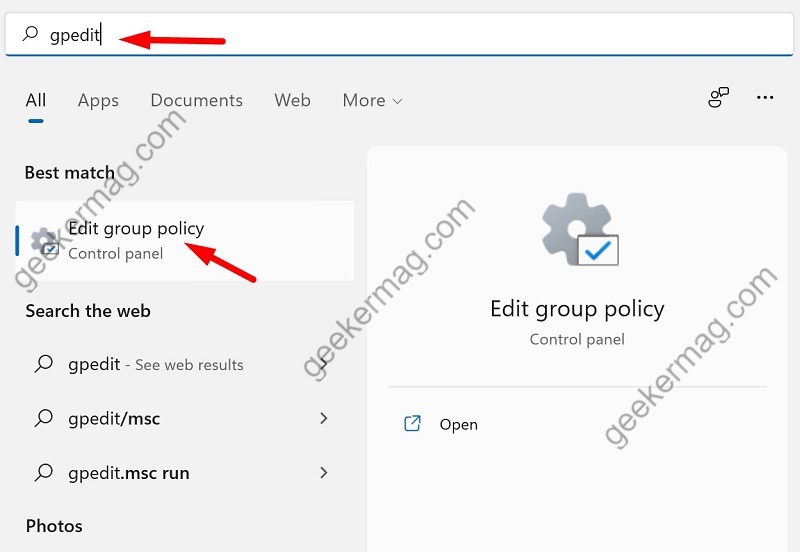
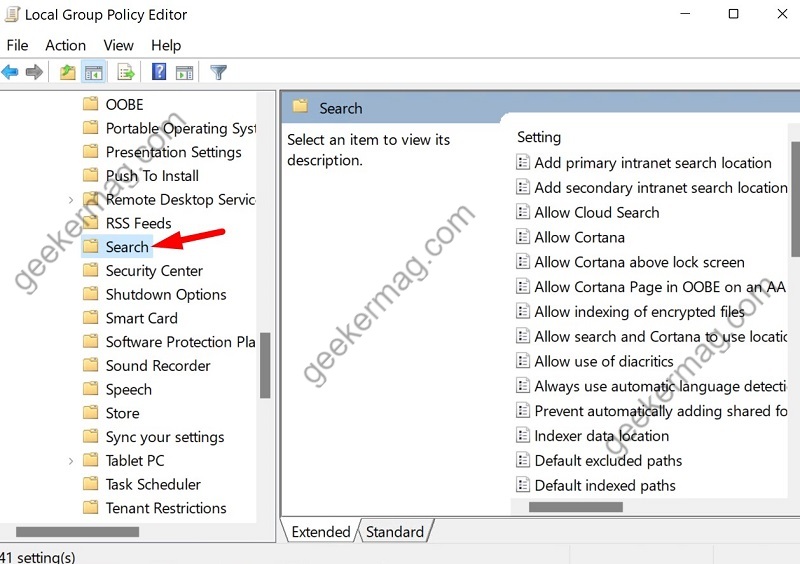
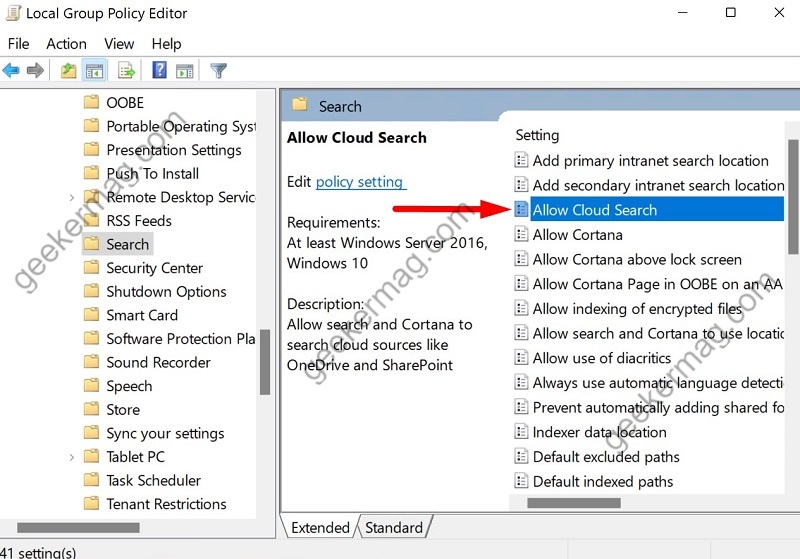
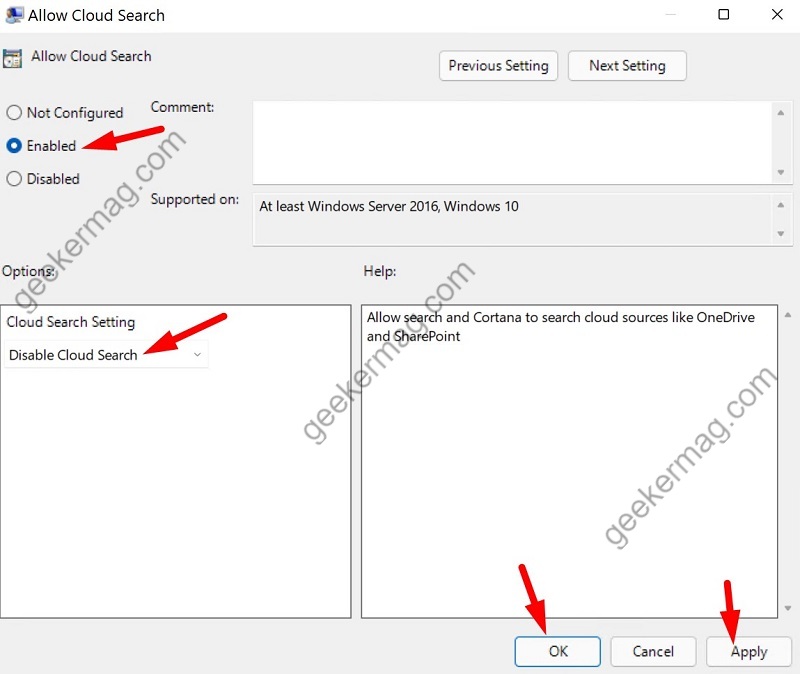
You can also use Group Policy Editor to disable cloud content search. To do this, you must be logged in as an admin user. (Note that Local Group Policy Editor is only available in the Pro, Enterprise, and Education of Windows 11) Open the Start Menu by pressing the WIN key on the keyboard and type gpedit.msc and when it appears in search results, click to open it. Now go to the following path: Computer Configuration > Administrative Templates> Windows Components > Search Now find Allow Cloud Search policy in the right sidebar and double click on it. In the Window that opens, select the Enabled option and then select Disable Cloud Search using the Cloud Search Setting drop-down. At last, click OK and Apply to save settings. After doing this, you will no longer see personalized search results from Cloud in Windows Search in Windows 11. Don’t forget, you have the option to enable it as well at any point.
