With the help of Windows Guest account you can offer other user a dedicated workspace which includes, separate browser, personalized desktop, file manager that has user data of particular user, One Drive cloud storage as well as manage other Microsoft services linked to account.
How to Add New User Account in Windows 11
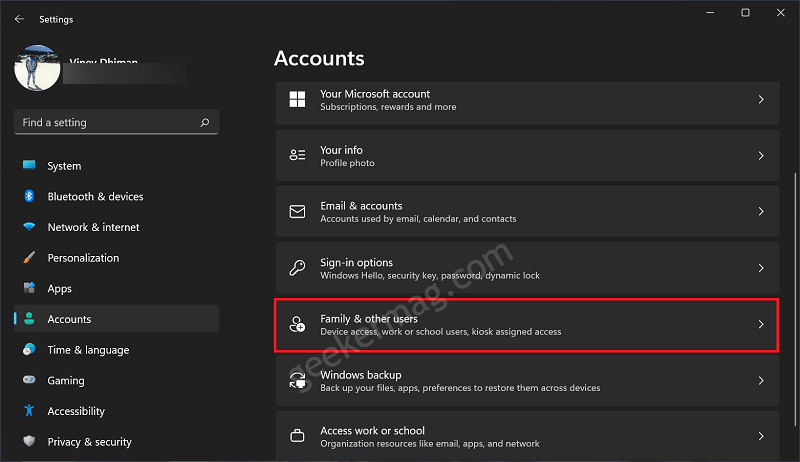
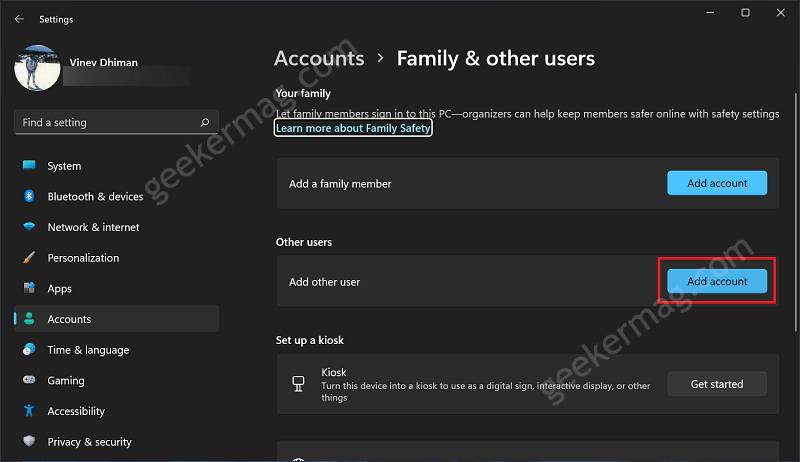
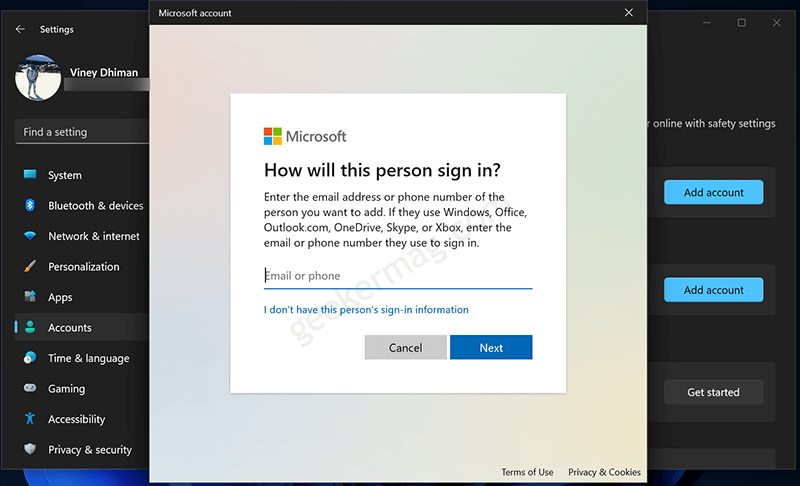
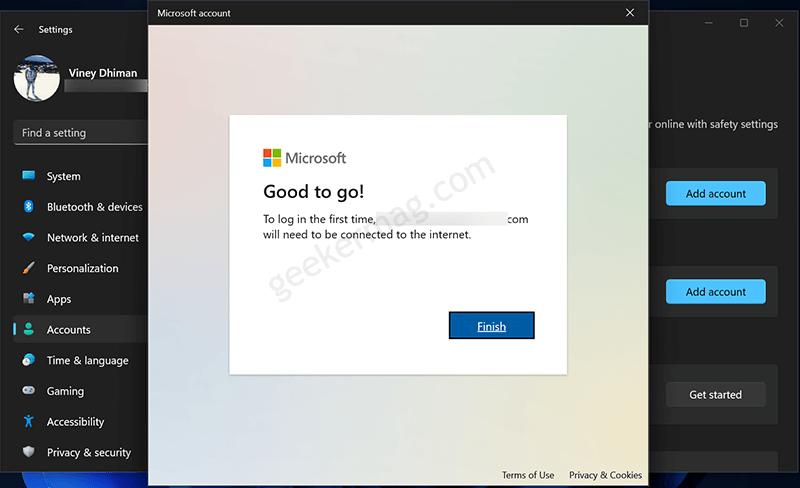
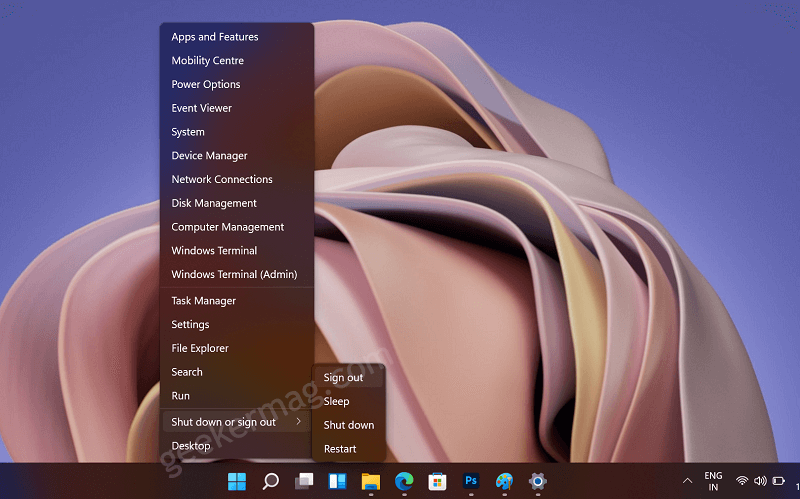
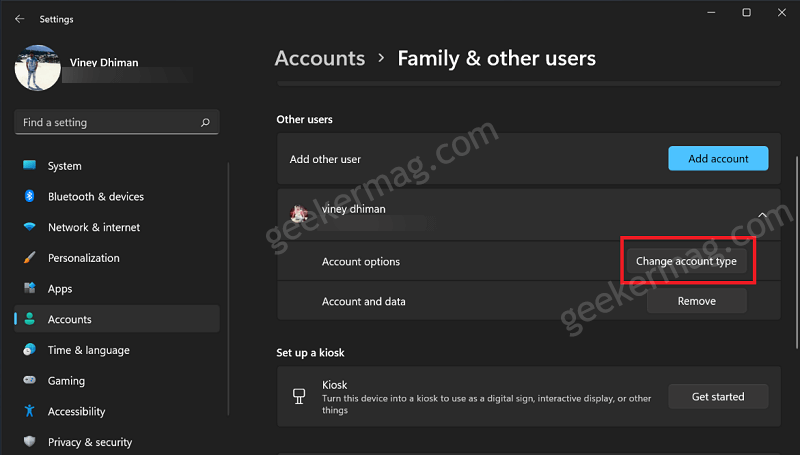
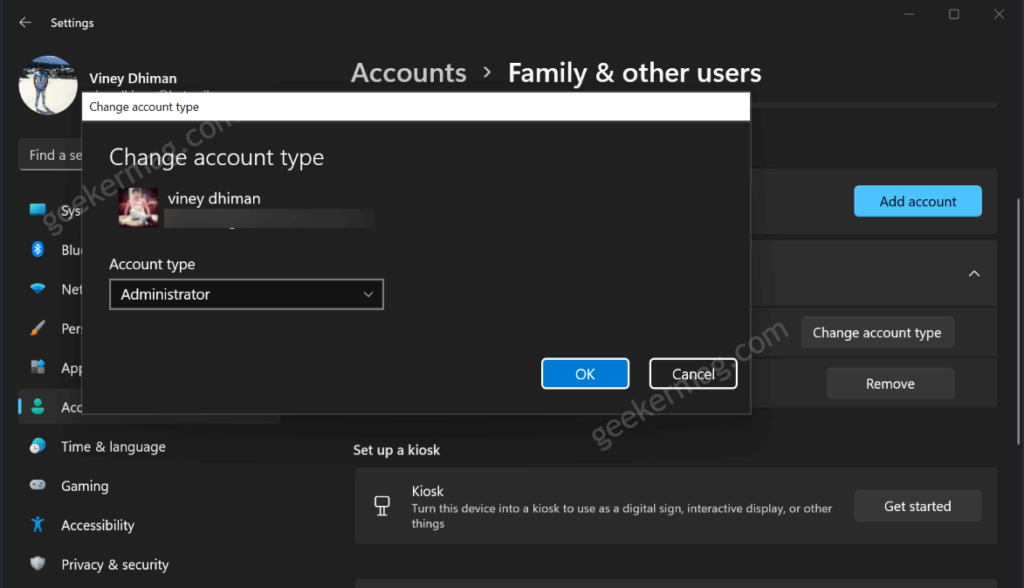
In case, you have recently upgraded to Windows 11 and don’t know the exact steps on how to do that, then here are the steps you need to follow: Launch Settings app in Windows 11. For that, right-click on the Start button and select Settings from the menu. In the Settings app, you need to select Account > Family & Other Users. Head over to Other users section and click on Add account button available next to Add other users option. Want to set a family member account in Windows 11 PC, check out How to Add Family Member Account in Windows 11 PC Instantly, Microsoft login dialog box will appear, enter the email account of the other user who’s going to share your Windows 11 PC. Once done, you will receive a message i.e. Good to go. To login in the first time “Your email address” will need to be connected to internet, click on Finish button. To complete the setup of new user account in Windows 11, you need to right-click on the Start button > Shut down or sign out. It will take you direct to the Windows 11 login screen. Here on the bottom left corner, you will get user account listed with email address that you have entered above. Select the one and you will be asked to enter Password associated with that email account. Next, you will be asked to Set up PIN for your account. Once done, your PC will start setting up your new account in Windows 11. The process will take around 5-7 minutes and you reach Windows 11 Home screen. Congratulations, you can successfully created Other user account in Windows 11. The same account will be start appearing under Other users account section in Windows 11 Account settings. In case, you want to make the new user account an administrator account, then click on Change account type button available next to Account options listed under New account details. Instantly, Change account type dialog box will appear, using Account type drop-down select Administrator and click OK. Following the same steps, you can set account type of Standard whenever you want. So that its guys, you have learned how to add new user account in Windows 11 with Microsoft account. You might want to learn steps on How to Create User Local account in Windows 11. Apart from that, if you’re running Windows 10 PC, then check out blog post on how to create new user account in Windows 10
How to Remove User Account in Windows 11
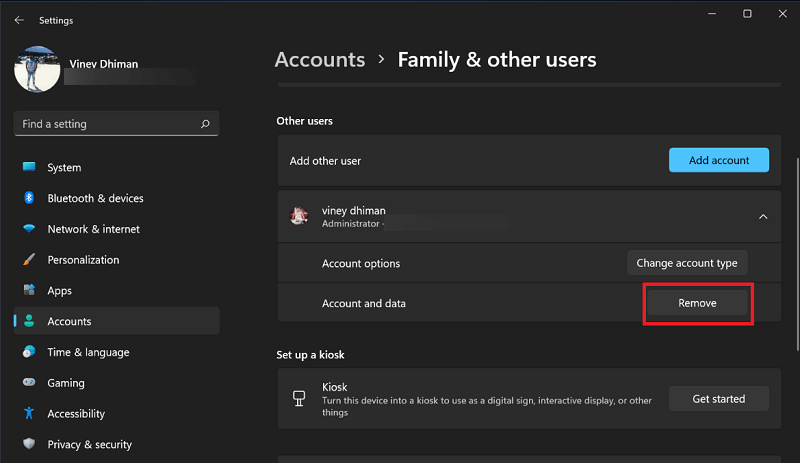
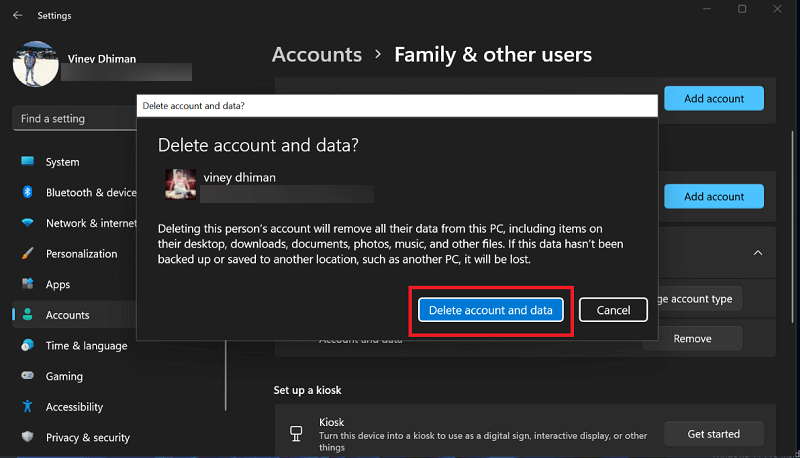
At any point, you want to remove particular account from Windows 11 PC, then here’s how you can do that: In the Settings app, go to Account > Family & other users. Under Other users section, locate the account that you want to remove. Click on the Remove button available next to Account and data option. A dialog box will appear, click on the Delete account and data button. Wait for few seconds, the account and data will removed from Windows 11 PC.