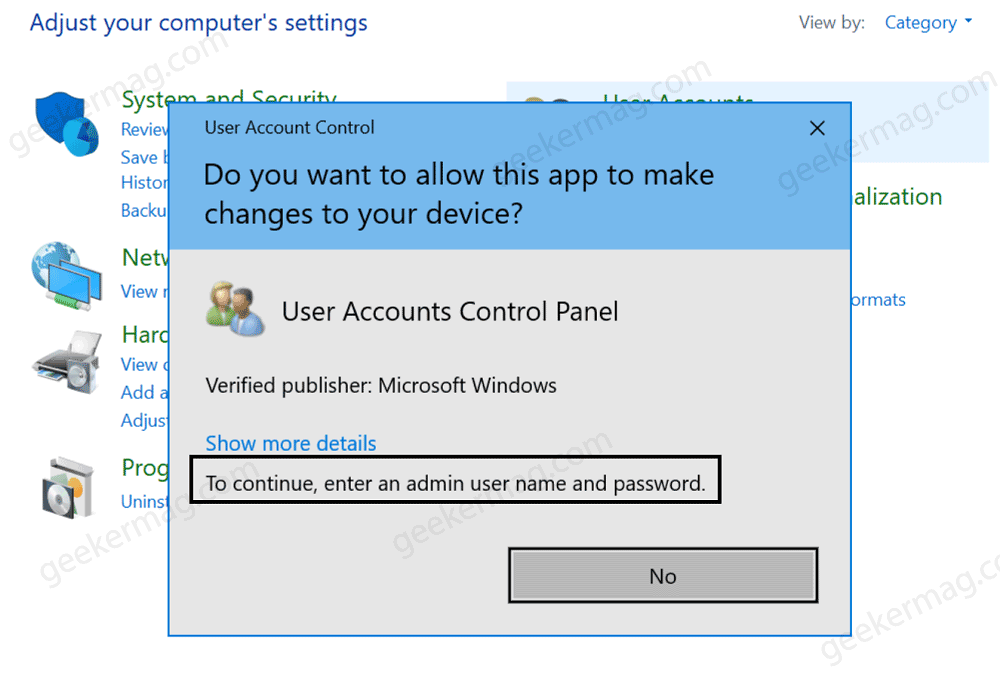
Usually, this occurs when your system is under attack by malware or misconfigured settings in user groups. If you’re affected by same issue, whenever a UAC dialog box appears, you will see a message “Enter admin username or password” or Yes button will be missing from the UAC dialog or similar. Check screenshot above for an idea.
How to Fix “Lost Administrator Rights in Windows 11 | Windows 10”
If you’re affected, then this blog post will share with you possible ways how to fix lost administrator rights issues in Windows 11 as well as in Windows 10. So let’s get started:
Enabling The Built-In Administrator Account
Windows has a built-in administrator which can be used for fixing issues like lost administrator rights. If you have been facing this issue, then you can easily resolve it by enabling the built-in administrator account by following the steps given below- Boot your Windows PC in Safe mode in Windows 11 and Windows 10 Once you’re in the Safe mode, press the Windows + R key combo to open the Run Dialog box. Here, type netplwiz and hit Enter. You will see a prompt that will ask you for your superuser admin account password. The password is generally blank, so click on Yes leaving the space blank. If it doesn’t work, then enter the password of the user account and click Yes. In the User Accounts window, double-click on your username. This will open its Properties. In the Window that opens switch to the Group membership tab in the Properties window. Here, select the Administrator option, click on Apply, and then click OK to save the changes. After that restart your computer to boot into regular Windows mode. This will restore the administrative rights on your Windows 11/10 PC.
Using Command Prompt At Boot
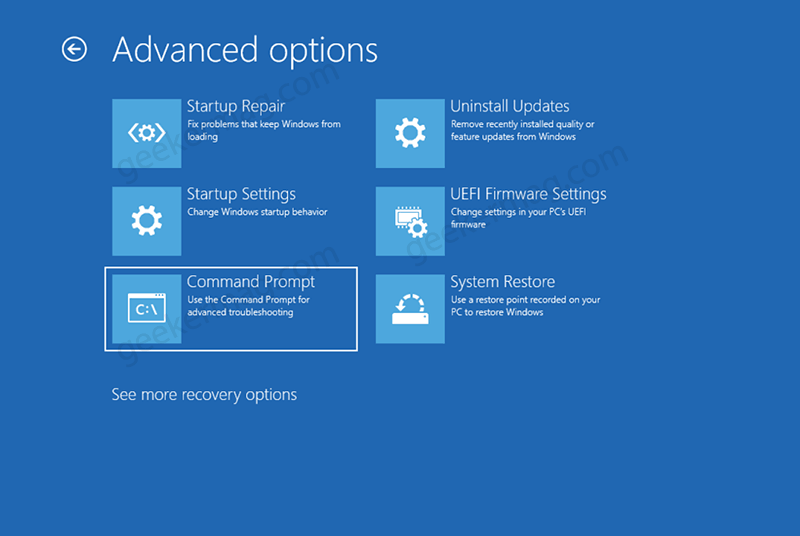
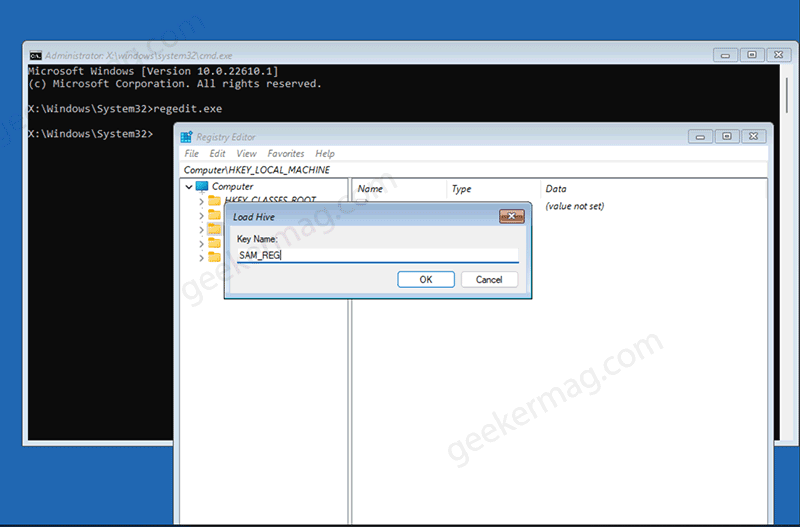
Another way to fix this issue is through Command Prompt. However, this method is more difficult than compared to the first method and you should only go for this method if the first method didn’t work out. Boot your Windows PC to the recovery environment following the instructions discussed here. In the Windows Recovery Environment window, click on Advanced Options > Command Prompt. In the Command Prompt, type regedit.exe and hit enter. This will launch the Registry editor. Here, you need to click HKEY_LOCAL_MACHINE Next, click on the File option on the ribbon bar and click on Load Hive. You will have to select the hive from the current Windows installation, which will be C/D:/Windows/System32/Config Note- SAM file is loaded in Windows Recovery environment by default which is called X drive. Ensure, you select collect SAM file. Select the SAM file in the Config folder and click on Open. Name the file as SAM_REG and click on OK. This will load the file with the same name in Registry Editor. Head to the following address in the Registry Editor: Computer\HKEY_LOCAL_MACHINE\REM_SAME\Domains\Account\Users\00001F4 Now on the right side, double-click on F (REG_BINARY) to edit it. Now, place your cursor on line 38 on the right of 11 and then press Backspace to remove it and type 10 instead. Click on OK to save the changes. Now reboot your PC to normal mode for the changes to take effect and the issue will be fixed. So these are two ways that will definitely fix “Lost Administrator Rights in Windows 11 or Windows 10”. If you need further assistance feel free to contact us.